VFXArabia | The VFX creation of Alaa Alnahlawi (علاء النحلاوي)
Houdini Pyro for Fumefx artists (Object & Normals Velocity):
Coming from a Fumefx background it wasnt that easy to grasp every aspect of Houdini Pyro and replicate what I used to do in FumeFX, I will break what I learnt into multiple articles and this one will be about achieving Object & Normals Velocity.
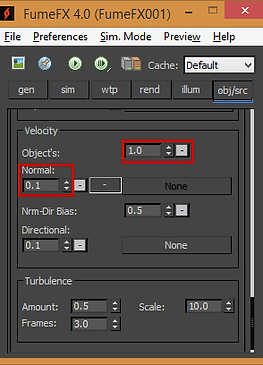
Well in Houdini Pyro you wont find those options as a default parameters rather you have to define them manually which is not sth bad at the end hence you will have a lot of control as you will see next.
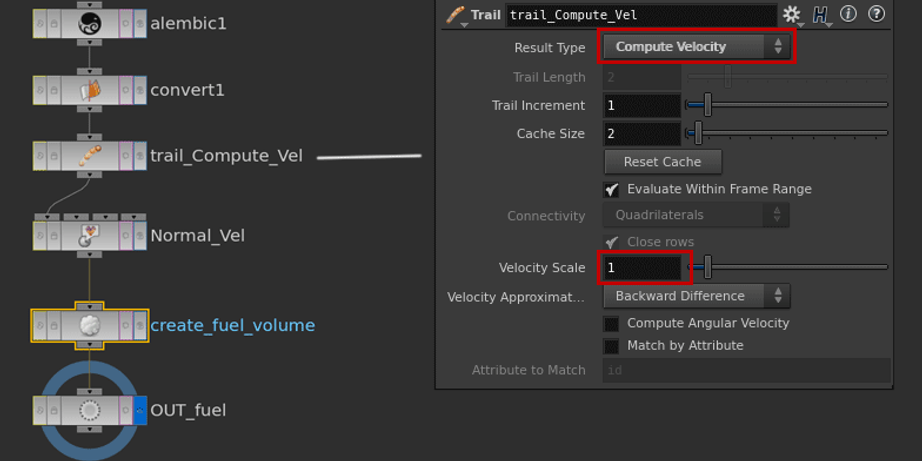
The scenario I'm going to show here is with an Alembic file (animated sphere) and I'm going to add a couple of nodes before we feed it out to pyro solver, those node will calculate the velocity of points as they move in space and add to them the normal vector. and it goes as simple as follows:
- I will assume that you are already familiar with the program and your object is already added to the simulation.
- First we will convert the Alembic file into mesh so we can read its points data individually, here I must say that in the load option in the Alembic node you can choose to load it as Houdini Geometry which will allow you to manipulate the object points, but I prefer this way.
- Second we will compute each point velocity by using a (Trail) node, let's set the result type to Compute Velocity and leave the Velocity scale set to 1. After adding this node if you checked the Geometry spreadsheet you will find some new tabs (V tabs) were added to the points data in addition to their position, indicating that those points have velocity data inside them.
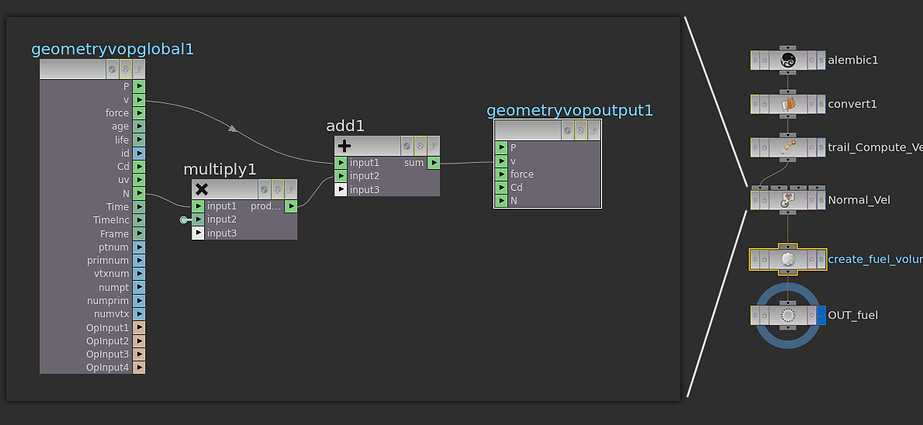
- Third step is we want Houdini to treat points normals as velocity vectors and add it the mix and we will do that by using a PointVop in two stages first we bind the Normal (N) with a multiply so we can adjust the strength as we wish and second we want to add the multiplication result to the velocity we computed in the previous step so we have both, or else if we wire the multiplication to the v output it will overwrite what we already have.
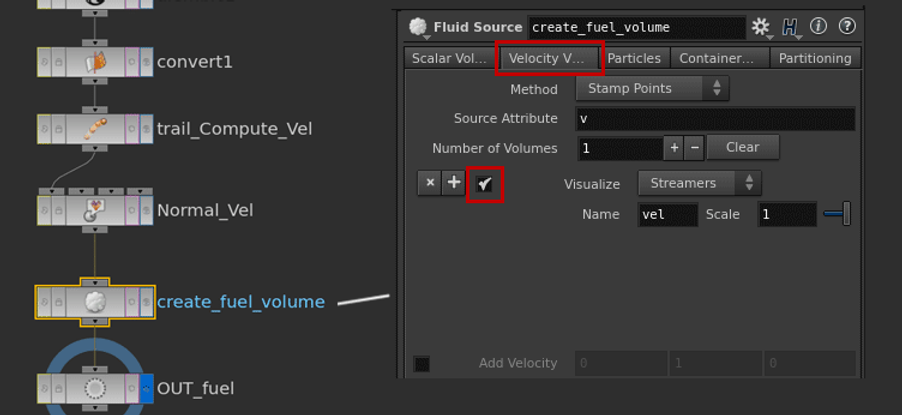
- Finally let's visualize it, select the fuel volume node and inside it jump to the Velocity Volume tab and tick the Visualize option there. Make sure you are not on a frame where the object is static and you should be able to see the velocity vectors overlaying your model.
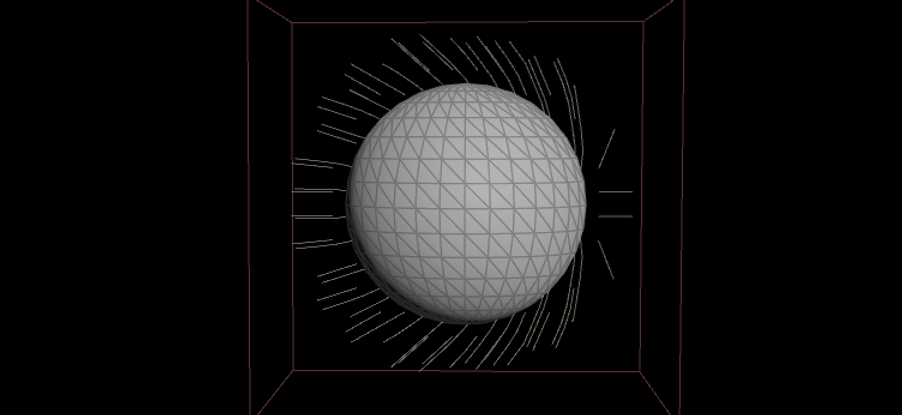
My object was moving to the left, you can clearly see the mix between the vel vector (which is pointing left) and the Normals one (pointing almost up in the upper area). Now you can balance between them using the multiply we add earlier in the PointVop to achieve the result you are after.
That was it for this tutorial, I really enjoyed writing this article and I hope you find it useful. I'm looking forwards for your feedback.
Regards
Alaa Alnahlawi.